How To Create a Great Hair Wing
 Hair wings are a very common type of wing in fly tying. Because we use them so often it is useful to know how to create a nice hair wing that has good movement in the water, retains its volume in the water without excessive bulk of materials, and has the correct profile. As with many things in fly tying the devil lies in the details. The choice of materials is crucial; without the proper materials it becomes impossible to create a good wing, no matter how good your technique is.
There are many different shapes of hair wings, depending on the type of pattern. From extremely long wings with relatively small profiles such as the Sunray Shadow, to the very full multi-layered wings of Temple Dog style patterns. To go over all these variations goes beyond the scope of this article. Instead I will show you how I tie a hair wing that is suitable for most applications. I use this style of tying for most wings and just adjust the shape of the wing according to the pattern that I want to create.
I choose my materials meticulously, based on their properties and the function they have in the wing. There are of course some alternatives, but these are the ones that I prefer for most of my wings at the moment:
1st wing: Marble Fox – The function of the first wing is to create volume and to help support the overlying wings so that it retains volume in the water. Marble Fox has a slight wave or crinkle in the hair. This helps to give it volume, and retain its volume in the water. It is also slightly stiffer than Silver Fox or Arctic Fox. It is still soft enough to allow good movement in slow to medium fast flowing water.
2nd wing: Snow Runner – The second wing is usually a bit smaller in volume and longer than the first wing. It needs to be soft enough to create good movement, yet stiff enough to retain some volume. I find Snow Runner perfect for this part of the wing. Especially when tying bigger patterns from 3″ and up. Snow Runner has very long hair, yet is stiff enough to retain volume. I prepare the Snow Runner in a specific way. Details on how I do this are in this video.
3rd wing: Himalayan Mountain Goat – The third wing is to give the overall wing even more length. It acts as a “back” and extends as a “tail” or “feelers”. We want this material to be very soft and mobile for maximum mobility, yet sparse and low in volume. Himalayan Mountain Goat has very little under fur and mostly consists of long strands of soft hair. It is very similar to human or monkey hair. HMG lends itself perfect for our 3rd wing application.
4th wing: Arctic Fox – After applying the 3rd wing you will see that the profile of the wing is a bit flat. It lacks some volume in the front; what I call a “shoulder”. In order to create a shoulder we need a shorter, softer hair that can blend well with the rest of the wing. I use short, very basic, Arctic Fox for this. I leave it approximately 1/3rd of the length of the 2nd wing, which creates a nice “shoulder” profile.
Techniques: For the 1st wing I use a reversed tie, which will promote the wing to stand up more and retain volume when in the water. I stack the other wings in a normal fashion in front of it. The thread gets covered by hackle materials. You can flare out the wing a bit by pushing on the tie-in-point with your thumb nail. This will distribute the hair over the tube or hook so that it gets a wider profile when seen from the top or bottom.
There are some things that can be done to “fancy up” the wing. I almost always add some glitter to the wing sections. For the 1st and 2nd wing sections I like to add a bit of Angel Hair. I sometimes add a wider flash material to the top of the back or the sides of the completed wing. I prefer crinkle mirror flash for this. Much of this is dependant on the tiers preference and does not really alter the functionality of the wing.
Some people like to use peacock herl as a topping. Although it looks good on the fly I don’t do this very often anymore. The peacock herl is very delicate and does not hold up very well. I prefer using a multi coloured flashabou for this purpose.
As in many things there are many alternatives to tie a hair wing. The way of creating a hair wing that I have described here is just the one that I have found to look and work very nice. If you have an interesting way of tying your hair wing please let us know by leaving a comment below this blog!
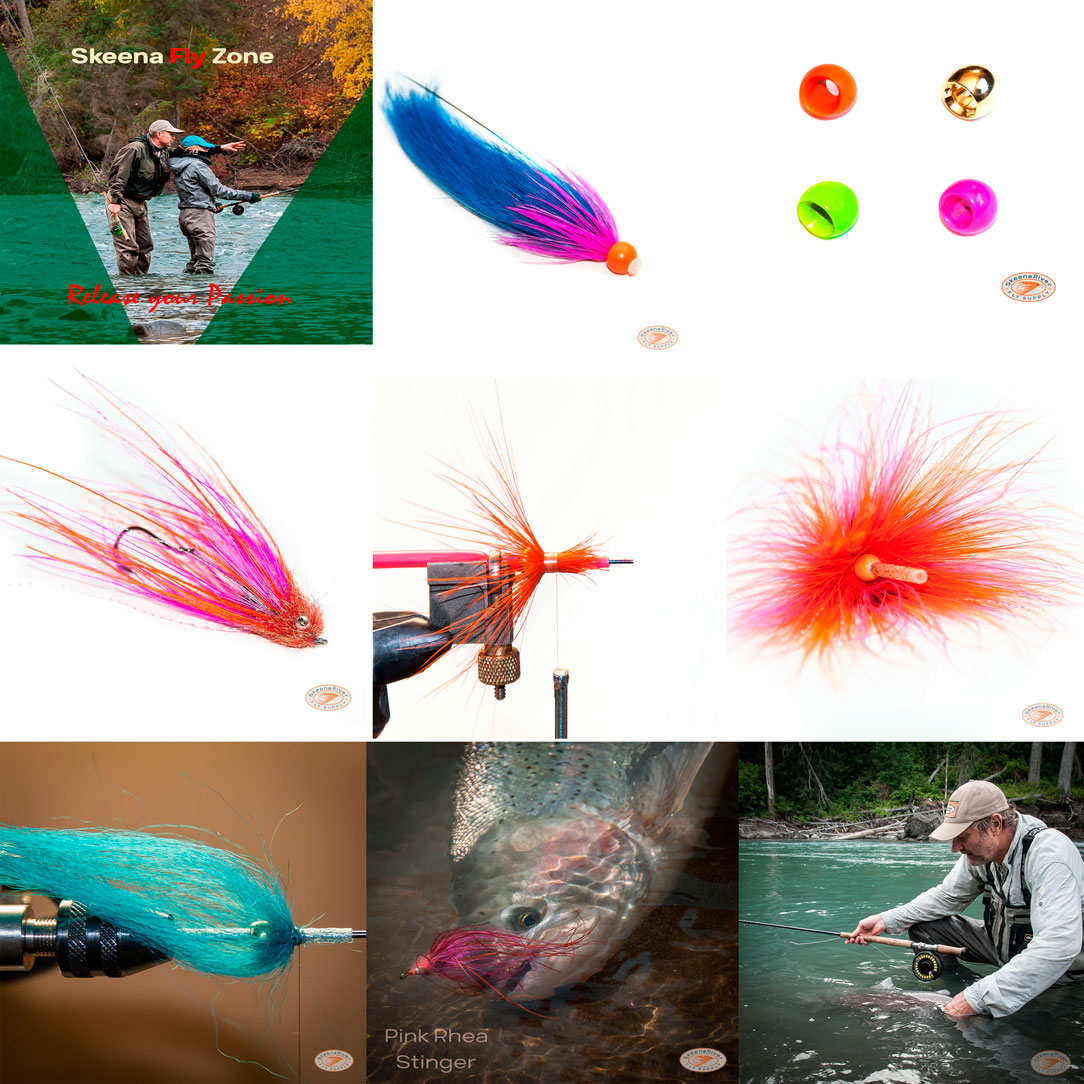
 Figure 1: Here is how I place my tubes in the vice in most situations. I use a HMH tube tool and a Skeena River Fly Supply machined tube mandrel. The outer tube is a 3mm plastic tube that I keep at full length and cut after I finish the fly. The inner tube is a 1.8mm Tough Tube. I melt a flange on it and insert it to where the tie in point of the thread is going to be. Tie the tread in tightly so that it pinches the 3mm tube. Place a couple of wraps at the junction. The tube is now fixed.
 Figure 2: Most of my hair wings consist of 4 wing sections. The first section is to create volume. For this reason I use marble fox. Unlike arctic fox it has a slight crinkle to it which helps the hair retain volume in the water. I also, usually, tie this first wing in reversed style; tie it in with the wing forward, then fold it back and secure it. Flare the wing out by pushing your thumb nail on the tie in point. At this pint you can wrap some thread in front of the wing or tie it down lightly like I did here. Note that the wing should stand up at a fairly acute angle at this point.
 Figure 3: For the second wing I usually use Snow Runner, unless the hair wing is very small, in which case I use arctic fox. When using Snow Runner I cut off a bunch of Snow Runner and only remove the very short underfur. Next I even out all the tips, which makes for a slightly softer, fuller wing.
 Figure 4: For the third section I use a very small bunch of Himalayan Mountain Goat. I leave this section quite long. This creates the long sleek wing profile of a Sunray or Monkey type pattern. The Himalayan Mountain Goat is perfect for this. It has long guard hair with good separation and little underfur.
 Figure 5: For the fourth and final layer I tie in a short bunch of arctic fox. This gives the wing a nice shoulder profile. The soft arctic fox blends nicely with the rest of the wing. The end result is a very nice, long, mobile wing that retains volume well and has a nice profile. Most times I will add small amounts of flash to the wing. Especially for the first and second portions of the wing I like to use Angel Hair. For classic Temple Dog style flies the wing sections will have a hackle in between. If I am not going to use a throat hackle or wing hackle, which will cover up the thread, then I will tie in the wing sections on top of each other in order to create a small head, such as on Sunray patterns. As a final finishing touch the wing can be combed. This will blend the layers a bit.